Here we will show many of the available features of an application generated with Web Form Builder code generator project.
Sorting
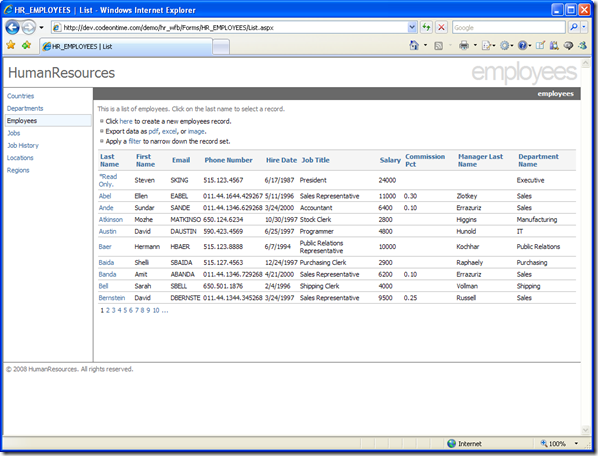
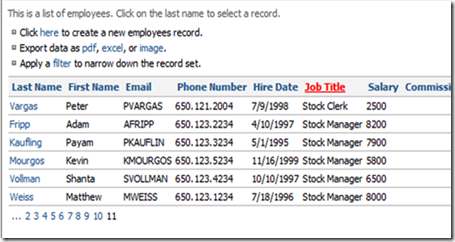
On the left side of the screen, you can see all the database objects discovered in your database. Clicking on an item will bring you to a list of records contained in the table. At the bottom of the list, you can page through the records by clicking on a page number. Sorting is done by clicking on the column header you wish to sort by. First click sorts in ascending order, and second click sorts in descending order. Sorting and paging are executed via client callbacks, eliminating the need for post backs, and speeding up your application.
Filtering
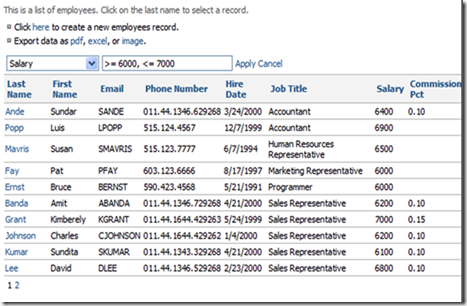
To create a filter, press Filter, which is located directly above the record list. A drop down and text field will appear. Select which field you wish to filter from the drop down, type in the filter criteria, and press Apply. The records will filter by your selection. Any partial or full filter will work. To remove your filter, press Cancel.
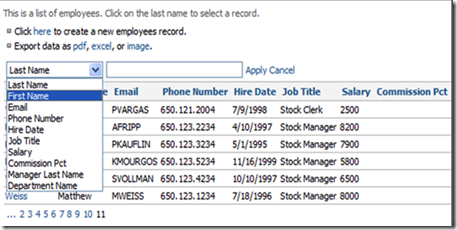
You can also use a comma to apply multiple filters, and comparison operators to further specify your filter. After applying a filter, you can still sort and page. If you choose to visit another page and return, the filter will remain, saving a lot of time. If you cancel your filter, but want to reapply it, the most recent filter will be remembered when you press Filter again.
Detail View
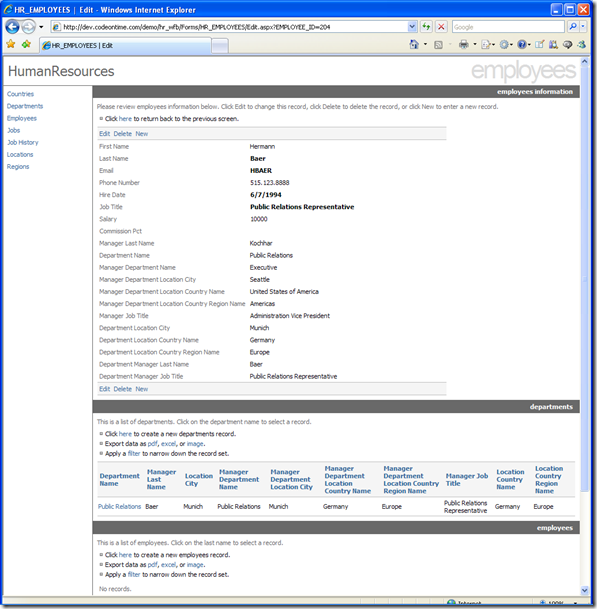
If you click on the first field of a record, you will be sent to the detail view of the record. All the information about the record is displayed here, as well as all the related child records. On the detail record lists, filtering and sorting is still available to you. You can edit the record by pressing Edit, delete by pressing Delete, and create a new record by pressing New.
Editing Records
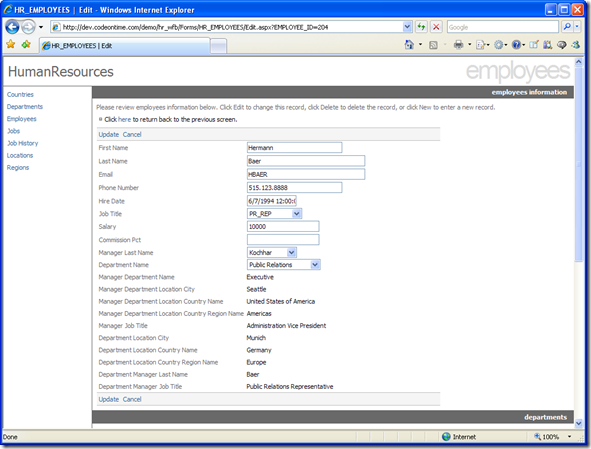
When you press Edit, the form switches into editing mode. Here, you can change many of the fields. Lookup values are represented as drop down controls. Read-only lookup fields are automatically inferred from your database and correspond to the editable lookup fields of your record. When you finish editing, press Update to save all changes, or press Cancel to go back without saving. You can also click on any of the objects on the left to go straight to their respective record lists without changing.
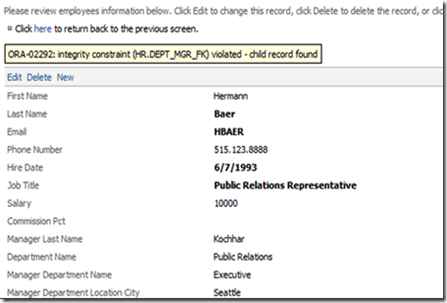
If you try to delete certain records which causes database constraint violation, the command will be canceled and an error message will appear. This can occur because the record can have associated child records, as in the example below.
Creating New Records
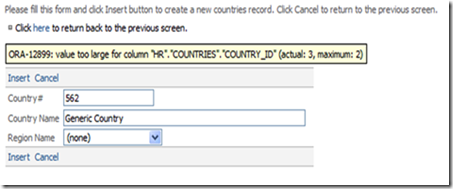
To create a new record, first go to the database object in which you would like to have the new record in. Press the link where it says "Click here to create a new record." The new record screen will appear, and now you can add values to all the editable fields, and set values to lookup fields with drop down controls. Press Insert to create your new record, or Cancel to go back to the previous screen without saving. Notice that when fields with database constraints are incorrectly entered, an error message will appear.
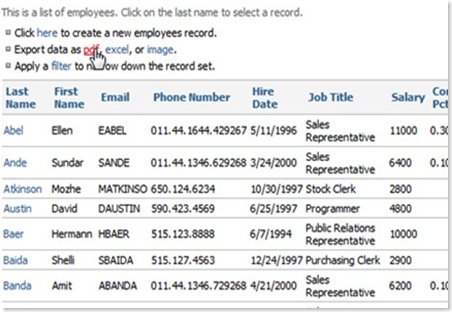
Generating Reports
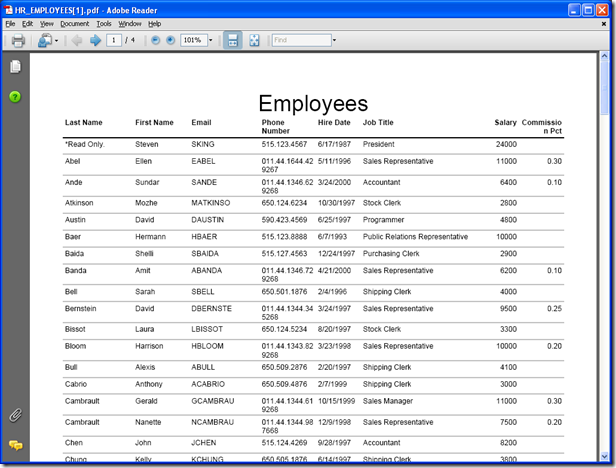
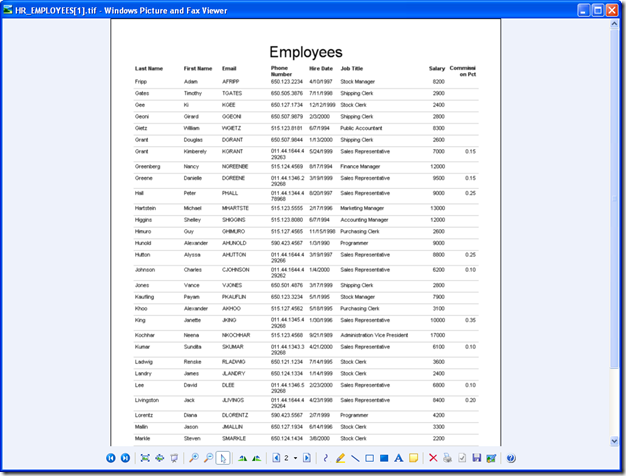
The second option above the records list allows you to generate reports of the current database object. Pressing PDF creates an Adobe PDF report. Pressing Excel creates an excel report. Image creates a .tiff file of the report. On all of these, a multi-page list will be created, showing all the fields for all the records. The date created and page number will be shown at the bottom. Report title and column headers are displayed for all of the pages. All fields are available for report generating, including those in master-detail pages. Any filters applied to the record list will also be applied to the generated report.
PDF report:
Excel report:
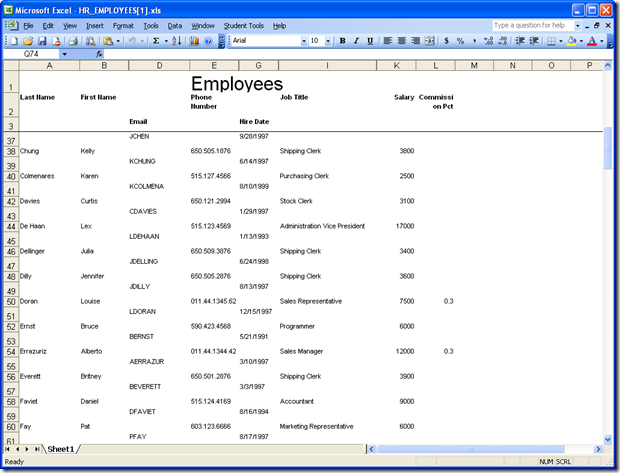
Image report:
This is just a short preview of some of the great user interface features that Web Form Builder applications generated with Code OnTime Generator have to offer. Find more useful resources on our support page.