Download and install the development web server Microsoft IIS Express and the app builder before you begin.
The app builder supports several database engines. This tutorial will work with any edition of Microsoft SQL Server. Create the new database in the cloud hosted in Microsoft SQL for Azure or your own server on-premises. You may need to contact your database administrator to get this done. Make a note of the database connection parameters, such as the server address, username, and password.
Alternatively get the free version of the powerful Microsoft SQL Server Express and install it on the development machine. You can skip creating the database since it can be done from the app builder.
This tutorial requires basic database management skills.
The database schema of a simple inventory management system is presented in the diagram. You will learn how to build an app that works in browsers with an option to run in the offline mode and be installed to run as a native app.
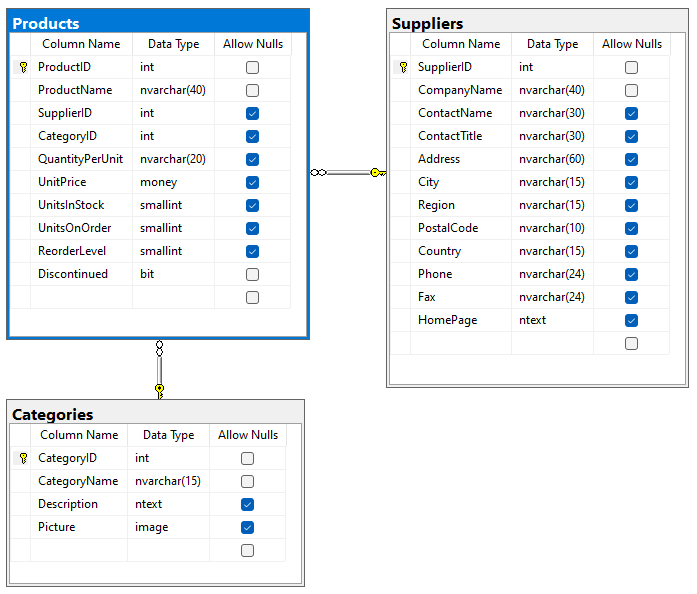 The diagram of the application database implementing a simple inventory management system.
Creating the Project
Start creating the new project, enter Northwind in the project name, leave the default settings, and proceed to configure the database connection. Click the “...” button next to the Connection String input.
Follow these steps to create the sample database and configure the connection:
- Enter .\sqlexpress in the Server field. If you are working with the hosted database engine, then enter its connection parameters instead.
- Enter northwind-db1 in the Database field and press Create.
- Choose the Northwind option in the Sample Tables dropdown and press Install. Wait until a prompt is displayed confirming that the database was created.
- Click the Add button under Membership and wait for the confirmation message.
- Leave Site Content (recommended) option selected under Content Management System (CMS) and press Add. Wait for the confirmation message.
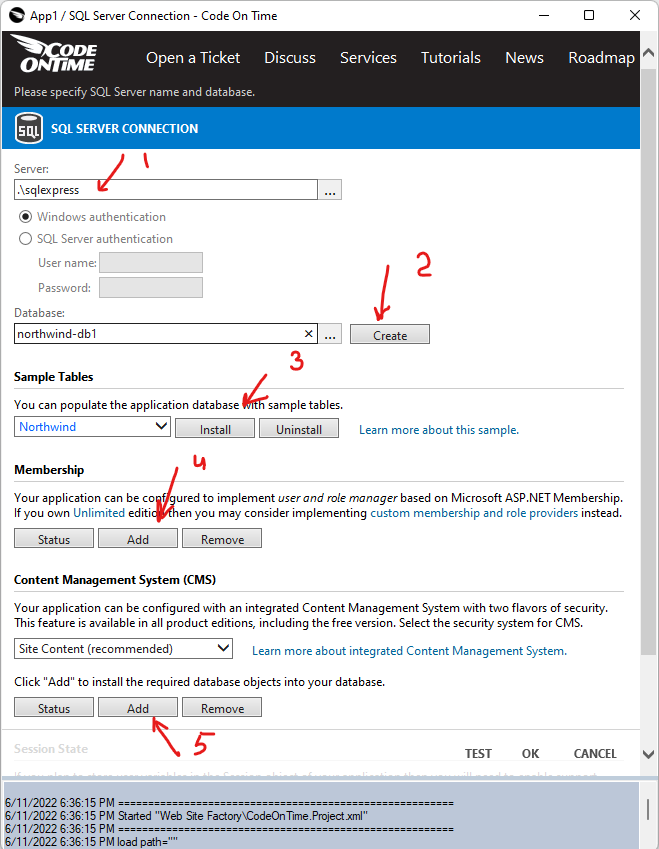 Configuration of the database connection string in Code On Time app builder.
Click the OK button to complete the configuration of the database connection string.
Press the Next button to proceed to the data model.
Data Model & Business Logic
Database northwind-db1 has a full set of sample data for the workshop. It also includes the membership tables to keep track of users, roles, and user roles. It has its own content management system (CMS) represented by the SiteContent table.
Suppliers
Scroll the list of database entities to the bottom and click on Suppliers. The flat list of fields at the top represents the denormalized references to the columns of the entities included in the model. Exclude the Suppliers.HomePage column from the model. Enter 1 in the Sort Order of the Company Name field.
Toggle the Master-Detail button on the toolbar of the model builder. Click on the Products (SupplierID) suggestion in the panel on the right-hand side of the screen. Confirm that you want to create the Products model.
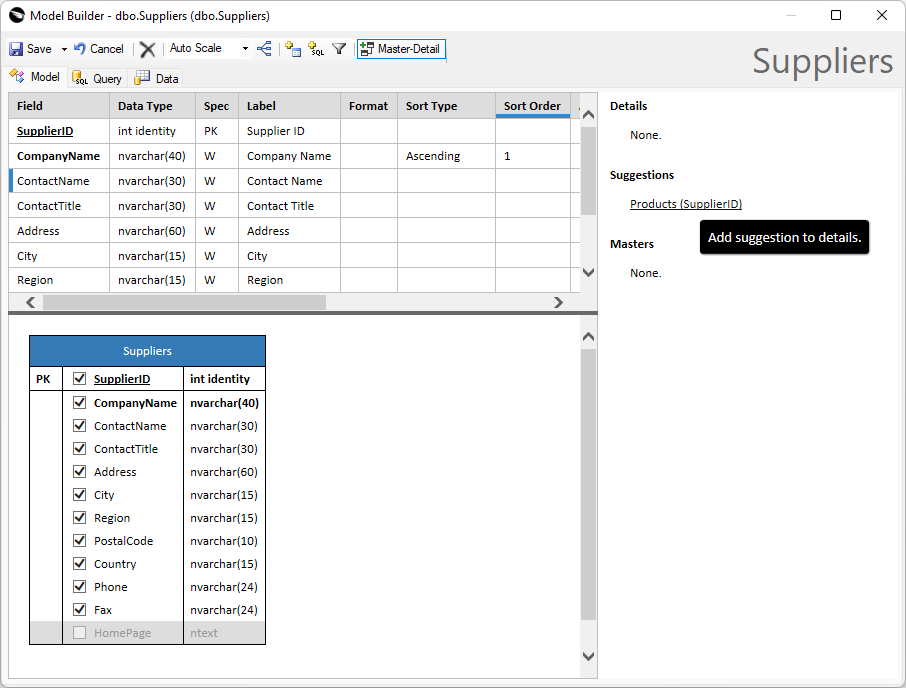 The model of the Suppliers entity in the Model Builder.
The Products data model will be displayed. The corresponding dataview field was created in the Suppliers model already.
Products
The new model is more complex. The model builder has added references to the Products, Categories and Suppliers entities. A few columns are automatically borrowed from the entities into the flat (denormalized) list of model fields. Rename the fields SupplierPhone and SupplierCountry to Phone and Country. Enter 1 in the Sort Order of the ProductName field.
Click the Save button on the toolbar to persist the changes.
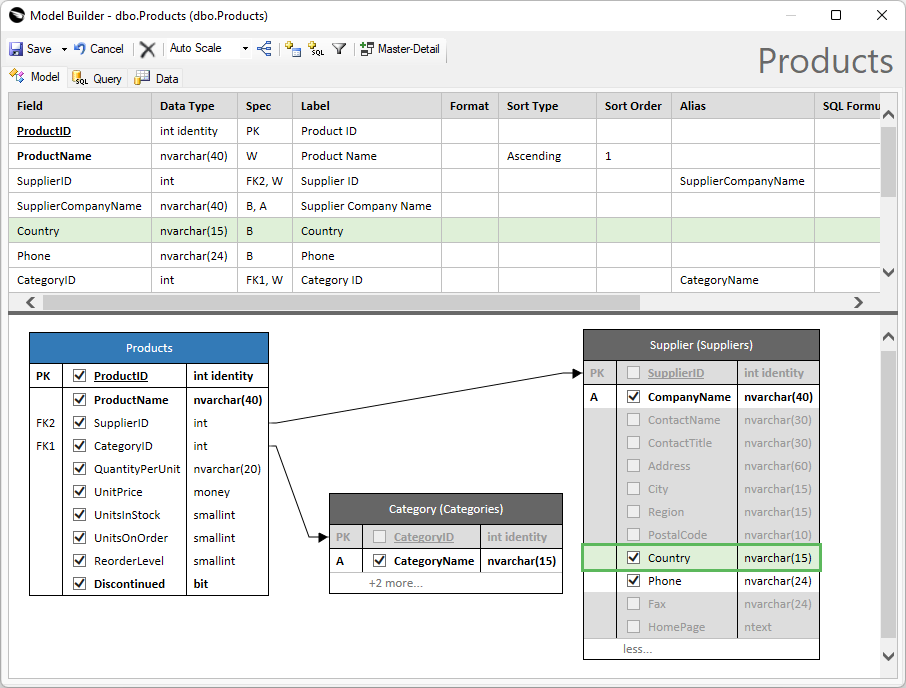 The model of the Products entity in the Model Builder.
You will see Products and Suppliers in the list of the configured data models.
Categories
Select Categories in the list of suggested database entities. Enter 1 in the Sort Order of the CategoryName field.
Toggle the Master-Detail button on the toolbar and click on the Products (CategoryID) suggestion in the panel on the right-hand side of the screen. This will create the Products detail in the model.
Click the Save button on the toolbar.
 The model of the Categories entity in the Model Builder.
Categories, Products and Suppliers will be displayed in the list of the configured data models.
Trying It Out
Keep clicking the Next button in the project wizard until you reach the data controller summary. Do not make any changes in the project settings yet.
The summary will display a list of all data controllers that will be created when the app is generated. You shall see Categories, MyProfile, Products, SiteContent, and Suppliers.
Press the Generate button and wait to see the result of your work. In less than a minute your default web browser will pop up and load the Northwind application. Let’s try it out!
You may be prompted to install the app from the browser as soon as it loads up. Either install the app or opt out.
 The "Install" prompt is presented to the user on every page of the app unless the user has not opted out of installation. Aggressive promotion of installation simplifies the job of IT department. Apps will self-update when the new server-side code is deployed.
Click on the Instruction on the home page and sign in as admin with admin123% password.
Choose the Suppliers option in the menu, tap the Suppliers (29) dropdown on the toolbar below the menu, and select the Reading Pane option. Choose a supplier to see the details in the split view. The list of the associated products will be displayed in the reading pane.
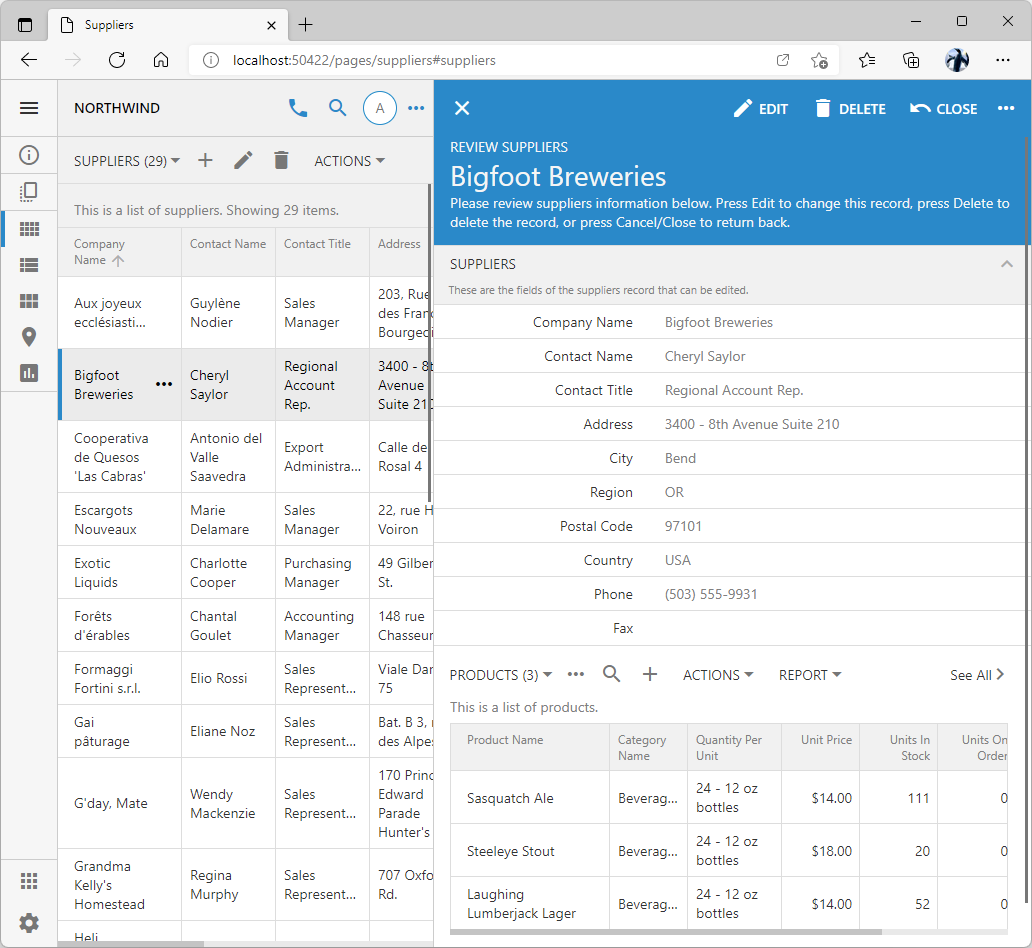 The reading pane in the app created with Code On Time.
Now visit the Categories and select the Cards view style in the sidebar.
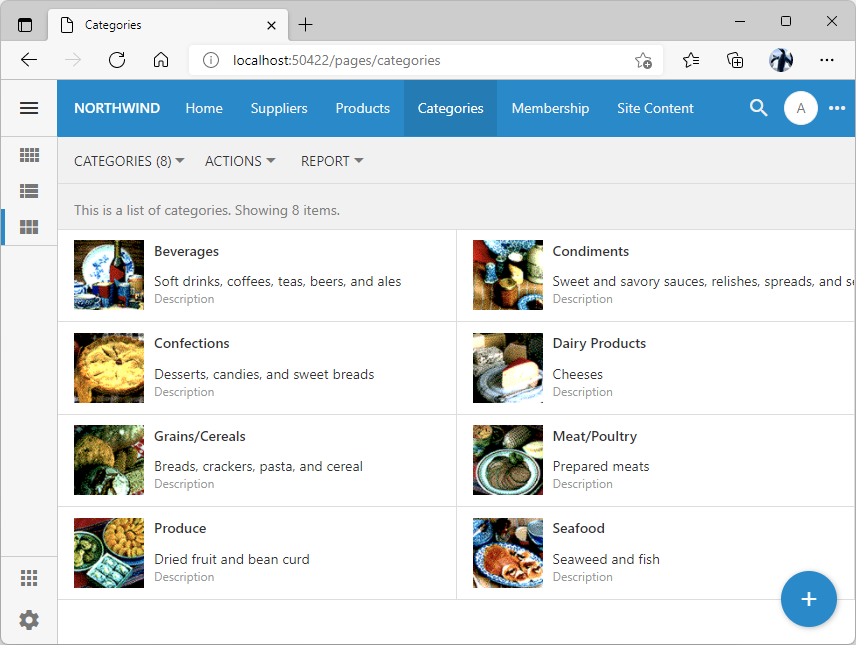 "Cards" list view style in an app created with Code On Time.
Select a category and observe that the related products are also visible in the form.
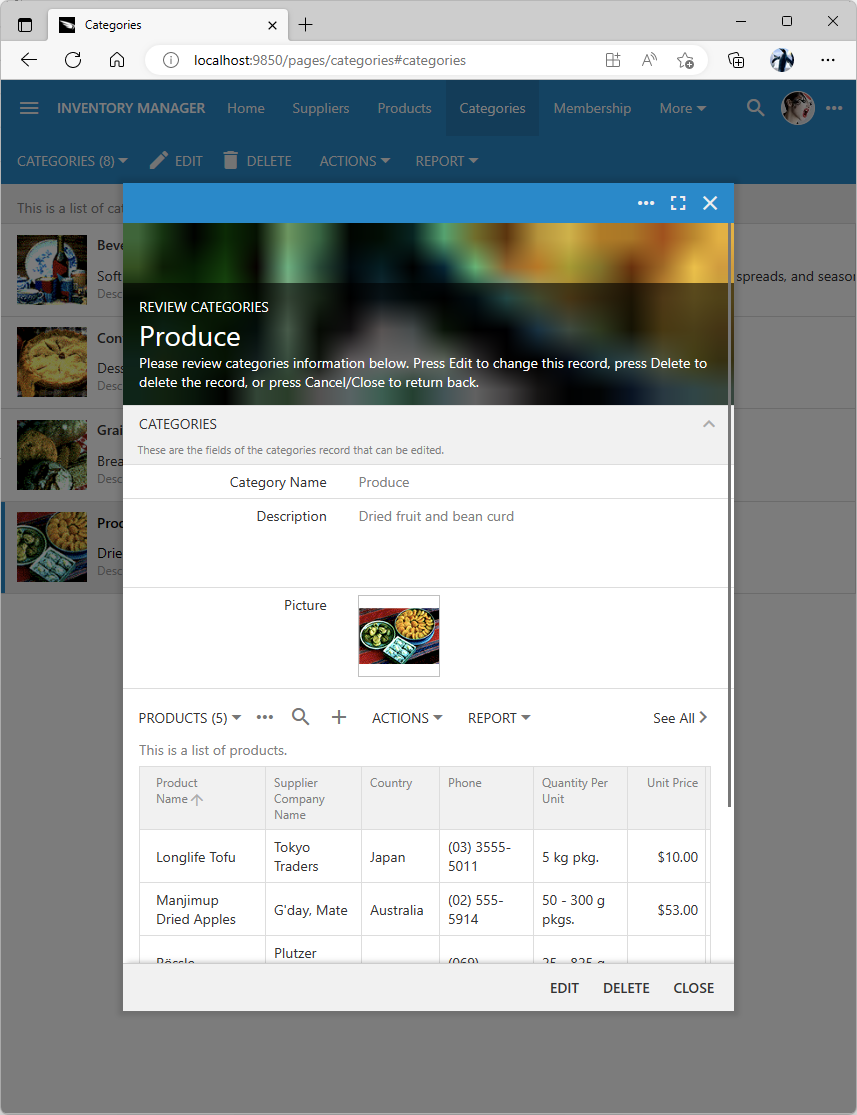 A category in the modal form with the related products.
You can add new data models and revise the existing models with the Model Builder. You can customize the visual presentation in the Project Designer or create Code, SQL, and JavaScript business rules to respond to the changes in the state of data.
This application may meet and exceed your expectations for the user interface of an inventory management system as it is!
Next
Continue to learn how to use Code On Time with these tutorials: