Business applications require a generic mechanism to store various types of system content. User avatars, access tokens, and dynamic configuration settings are just a few examples of such content.
Schema
Applications created with Code On Time have the built-in Content Management System (CMS) that allows persisting the app-specific data at runtime. The single table named SiteContent acts as a file system for the app. The FileName and Path columns describe the virtual file location. The data is stored either in the Text column or in the binary Data column. The ContentType provides the MIME type information explaining the purpose of the data.
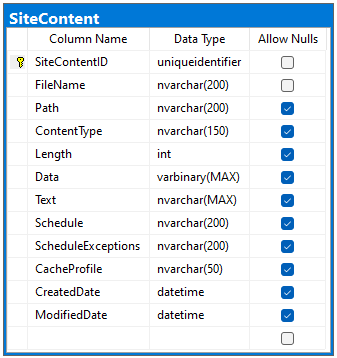 The entire CMS is implemented in the single table. It acts as a virtual file system for the data required by the application at runtime. The Path and FileName columns allow apps to locate the data. The ContentType provides the hint on how to handle the content stored either in the Text or the Data columns. The CMS stamps the virtual files with the CreatedDate and ModifiedDate that are set to the value of the DateTime.UtcNow when the "files" are created or modified.
Administrators manually upload system content such as user avatars. The content can also be created in unattended fashion. For example, OAuth Authorization of the RESTful API Engine produces the system content to support the authorization flows.
Installing
Configuration of the application database connection string provides the Add button in the Content Management System section that installs the CMS when pressed. Application generator will create the corresponding data controller and the page to allow the administration of the system content. The framework looks up data in the CMS as needed.
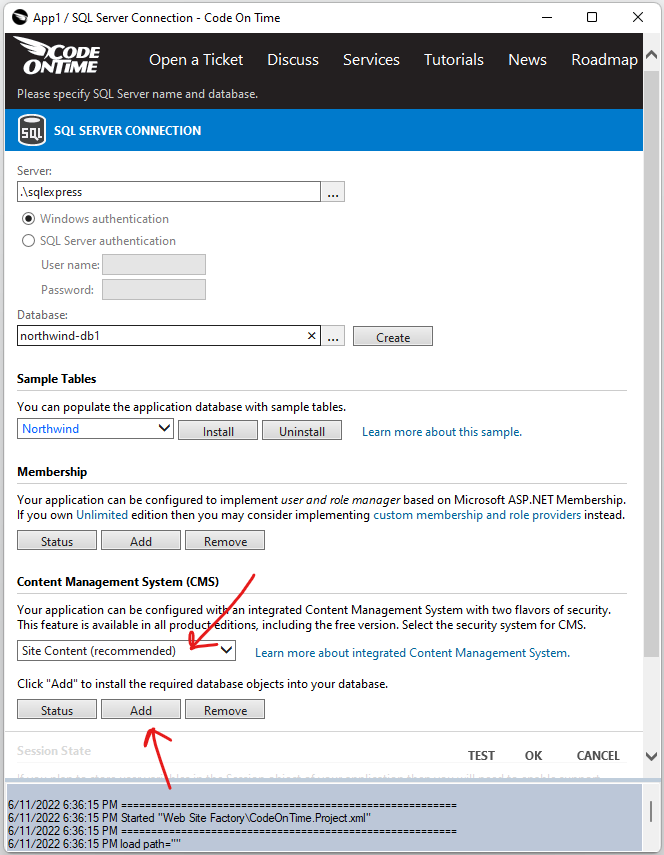
Click the Add button in the Content Management System (CMS) section of the database connection string configuration screen to add the SiteContent table to the database. Press Ok button and proceed to Refresh the project. Make sure to indicate that the database schema has changed.
The project needs to be refreshed if the CMS was added after the app has been generated for the first time. This will update the project metadata to include the CMS-specific information.
User Avatars
Administrators assign the user avatars by uploading the images with the path sys/users and the file name matching the username. The framework will ignore the file extension when locating the user avatar during the login process. By default the user icon is a “blank” circle with the username initials.
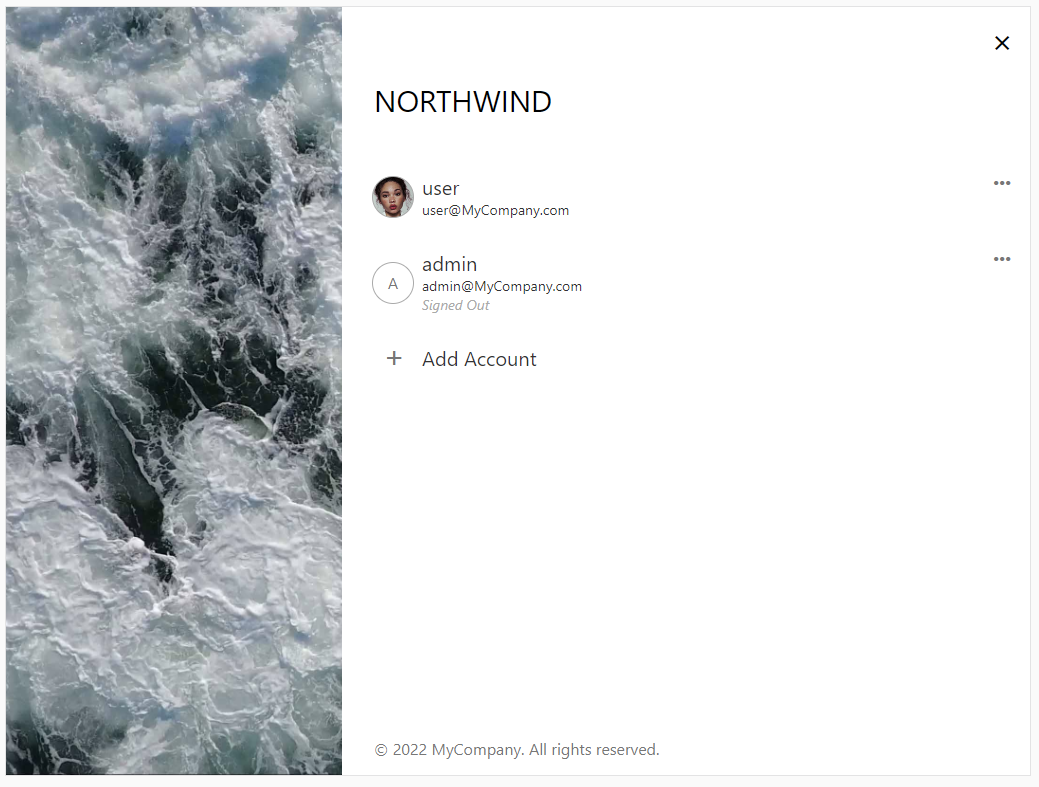
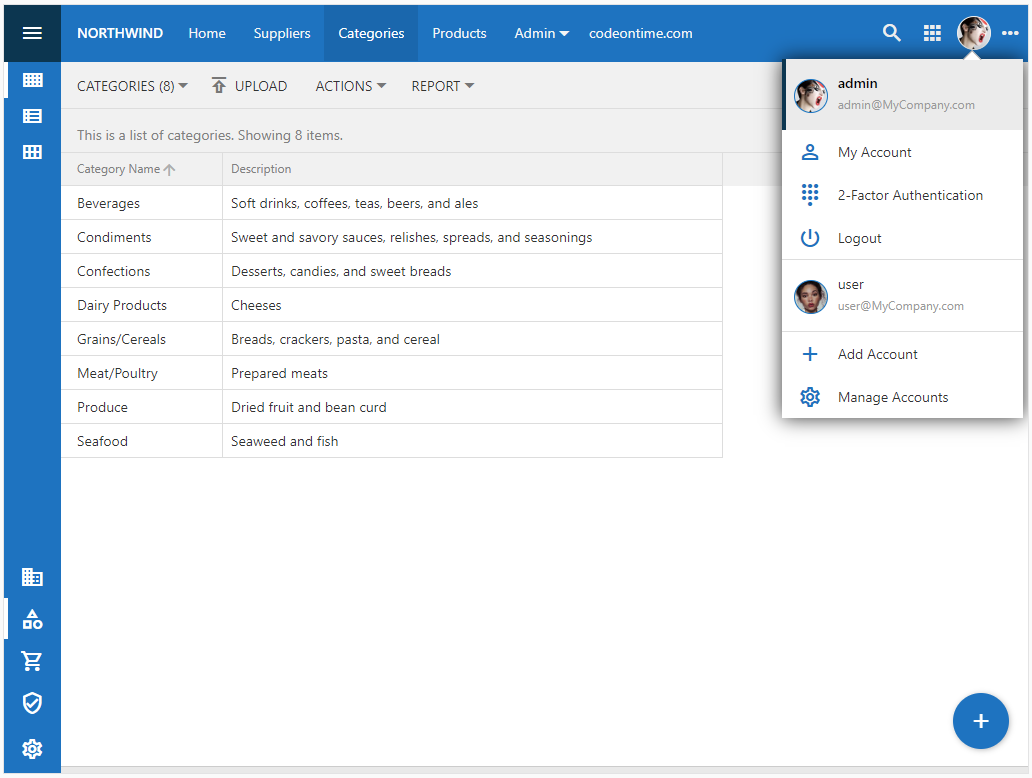
If there is an image of a user previously uploaded to the CMS, then the icon is presented in the user interface of the app.
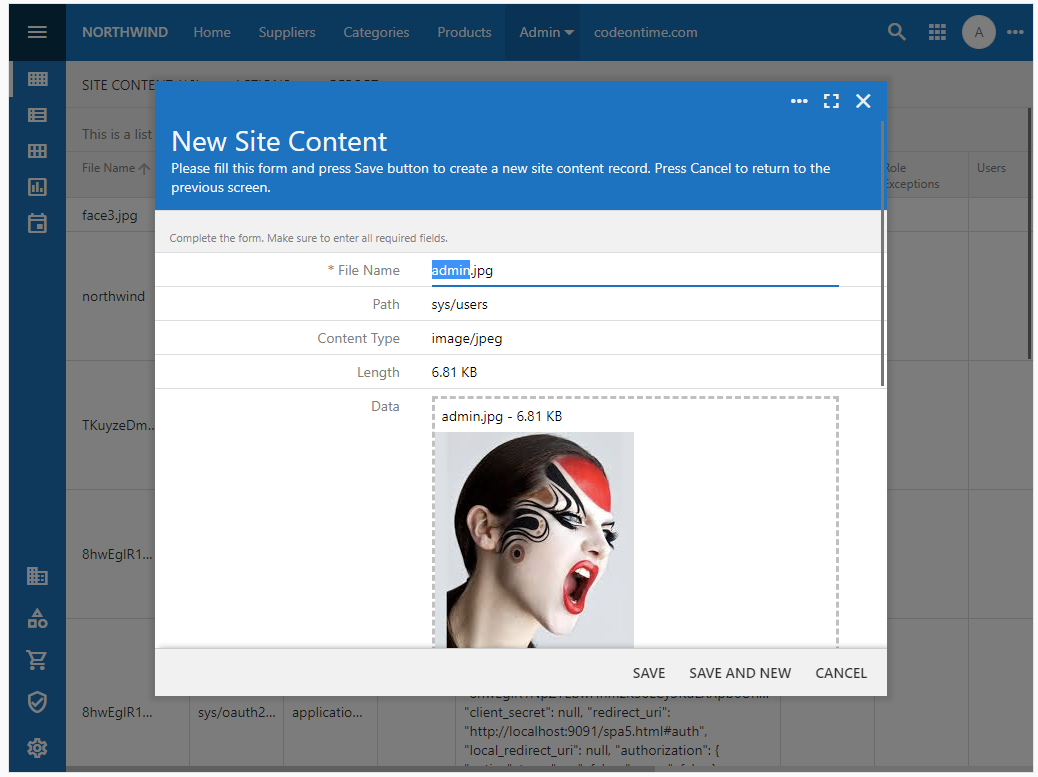
Follow these steps to create a user avatar:
- Sign into application as the user with the Administrator role.
- Navigate to the Site Content page.
- Press the “+” button in the bottom right corner of the page.
- Choose (custom) in the New Content form and press the OK button.
- Drag the user image onto the Data field placeholder from the File Explorer.
- Enter sys/users in the Path field.
- Change the File Name to match any username and keep the file extension.
- Press the Save button.
- Sign in as the user and the avatar will become visible in the application UI.
External OAuth Configuration
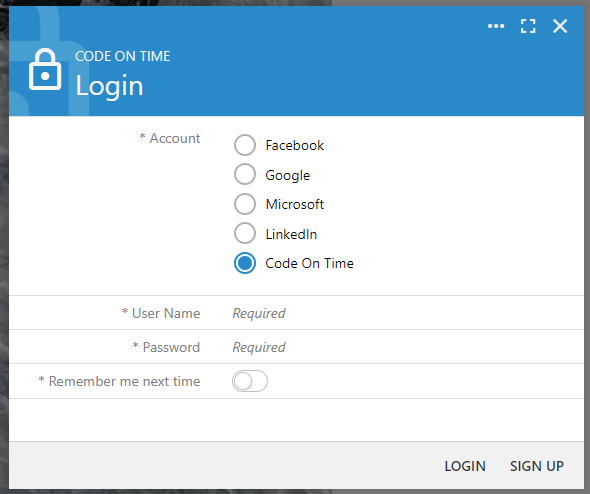
Application administrators have an option to enable the sign in for users with the Microsoft, Google, or Facebook account. The relevant options will automatically appear for each enabled provider along with the built-in membership-based login option.
The external OAuth provider configuration is recorded in the Site Content CMS. Administrators click the “+” button on the Site Content page and choose the Open Authentication Registration option to start the registration process.
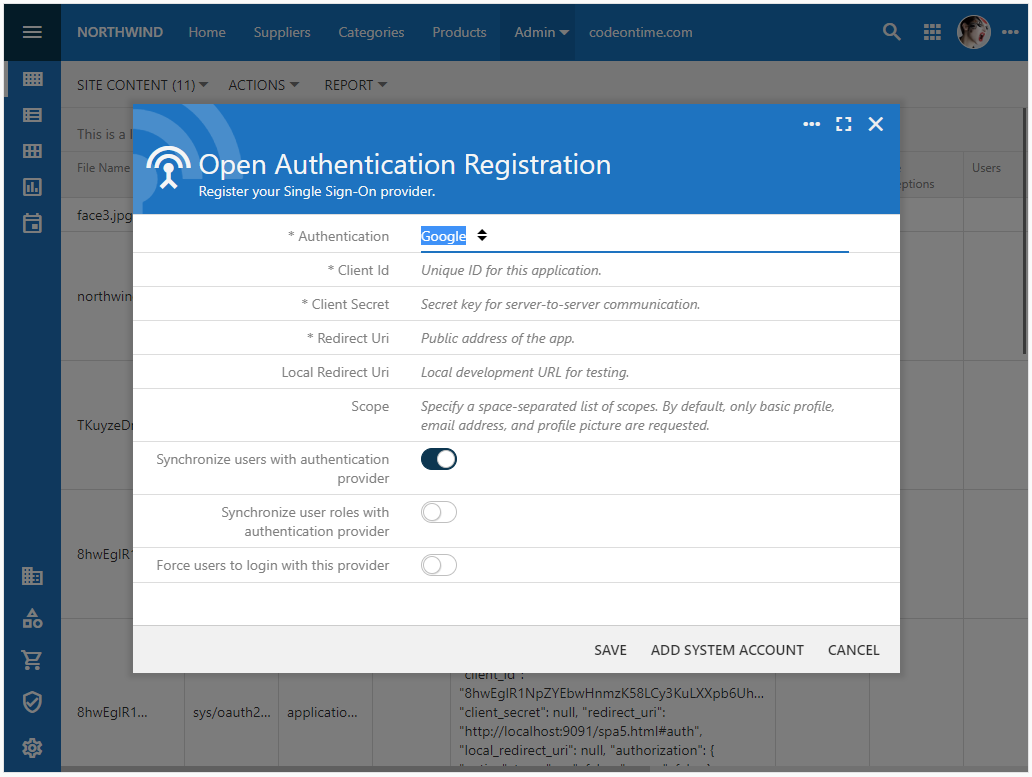
The framework fetches the user avatar from the external Open Authentication Provider and saves it in the CMS.
OAuth Data Repository
The single page application SPA4 from the RESTful Workshop explains how to create a standalone app that uses the OAuth 2.0 Authorization built into the sample backend created with Code On Time to authenticate the users.
The CMS of the RESTful Backend Application maintains the following data records in the CMS:
- Client application registration records.
- CORs entries.
- Authorization access requests.
- Authorization access and refresh tokens.
- OpenID user pictures.
Permanent and Temporary Content
Uploaded content types will remain in the database until explicitly removed.
RESTful API Engine performs automatic garbage collection, which involves the removal of the expired access requests and tokens. Each successful authorization deletes a small number of expired objects.
.