Wednesday, May 29, 2019
Multi File Upload
Code On Time release 8.7.11.0 introduces Multi-File Upload. End users can select multiple files and submit them for upload at once to create multiple database records. Application framework automatically inserts a table row for each file, uploads the file, and persists the data either to the database or to an external storage system.
Here is how it works:
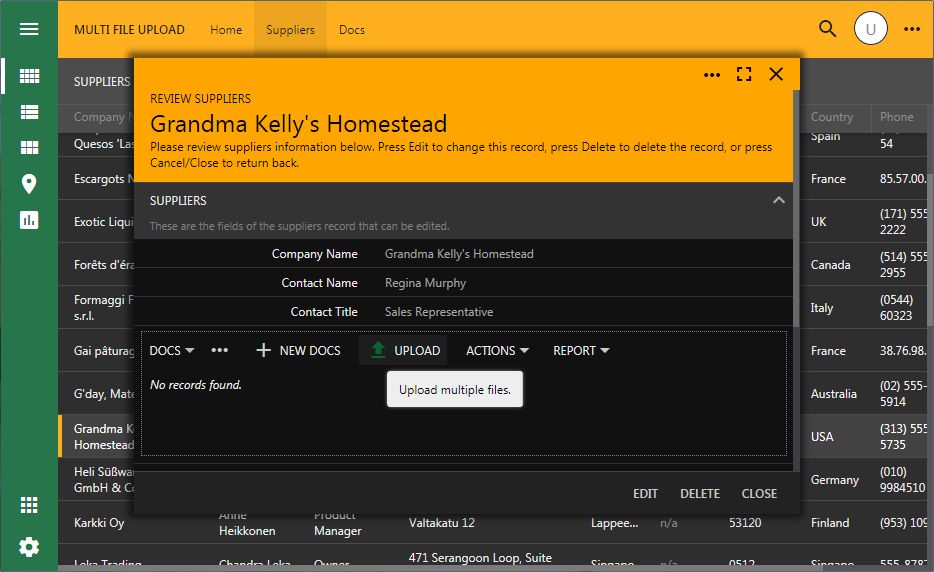
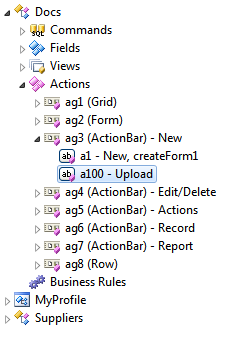
1) Start upload.
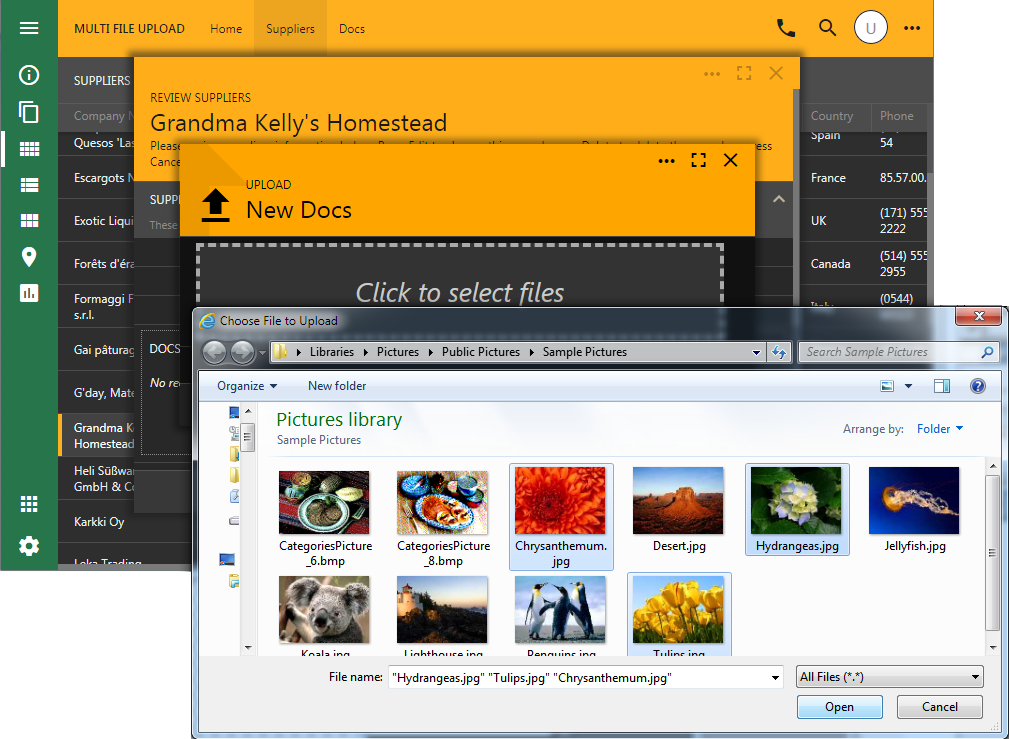
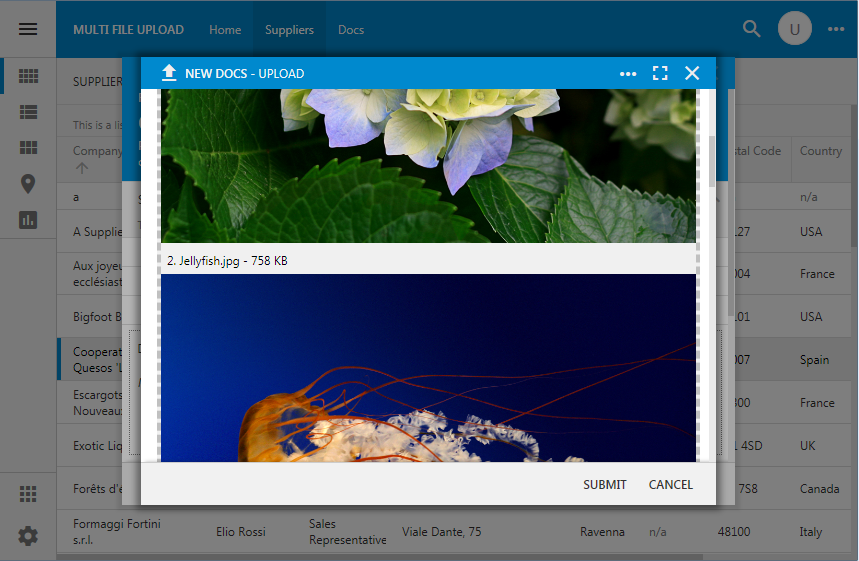
2. Select multiple files.

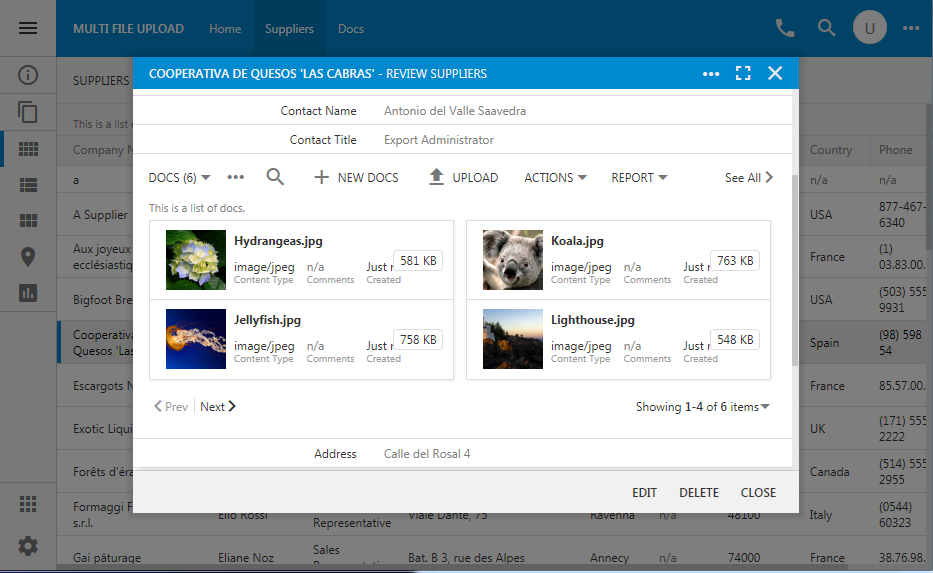
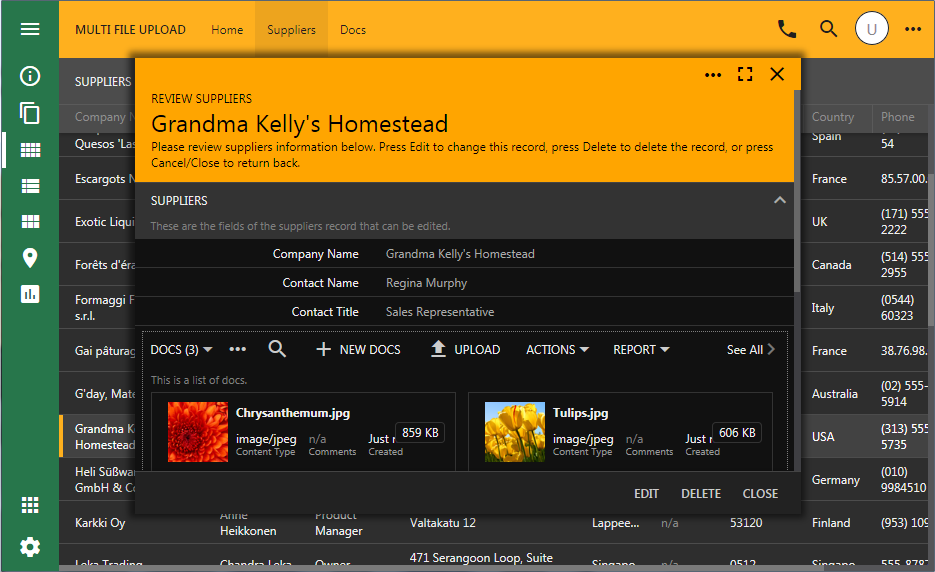
4. Multiple database records are created for each file and associated with a parent if needed.

The feature is activated when the Upload action is executed by the data controller. A built-in form is displayed to allow selecting multiple files for upload. User submits the form and the framework starts processing files one by one. For each file an Insert action is executed through the same data controller. By default, the view createForm1 is used to figure a list of data fields for Insert. An alternative view can be specified in Command Argument of Insert action. Special fields are detected to store File Name, Content Type, and Length of the file. For child data views, the master field values are also included. If insert is successful, then the physical file is uploaded to the server and stored in the first on-demand field of Byte[] type. Failure to insert a record or to upload a file will interrupt the processing. The data view is refreshed when processing of all files has been completed.
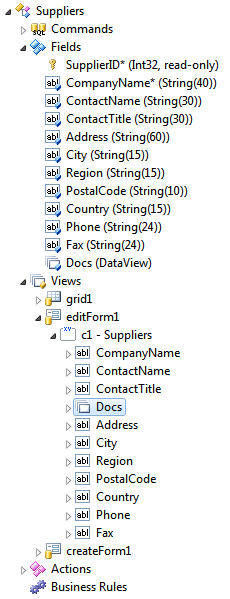
Consider the following database schema that allows associating documents with the supplier records.
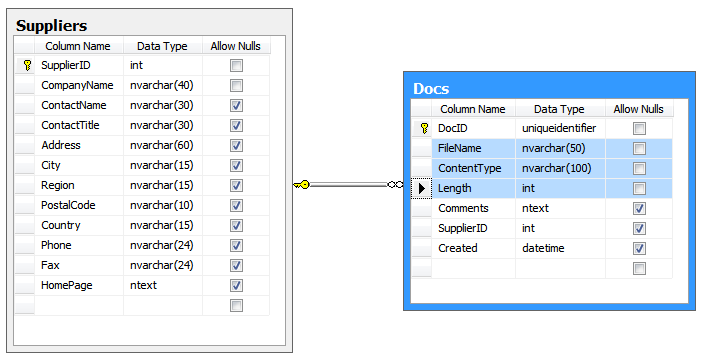
Table Docs defines three explicit fields to maintain information about the files: FileName, ContentType, and Length. The physical data will be stored outside of the database and processed with File System Blob adapter.
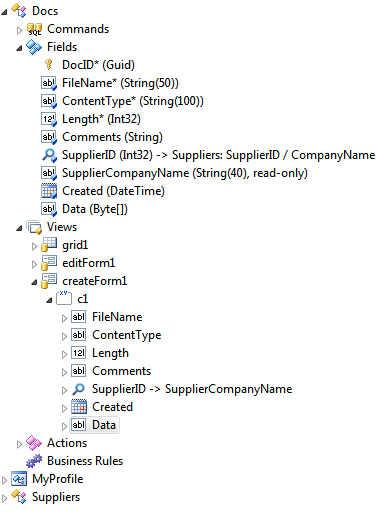
Start Code On Time and create an app with two data models - Suppliers and Docs. Next, start Project Designer and begin defining the new field with the name Data and type Byte[] in Docs controller. Mark the field as On Demand. Enter DocID in Source Fields and DocsData in On Demand Handler. Choose Thumbnail in On Demand Style drop down to have a file preview in the app. Save the new field and drag it to createForm1, editForm1, and grid1 in the Docs controller.
Select Docs data controller and enter the following in the Blob Adapter Config property:
Field: Data
Storage-System: File
Path-Template: C:\app\DocsFileData\{DocID}-{FileName}
File-Name-Field: FileName
Content-Type-Field: ContentType
Length-Field: Length
Make sure that the specified folder C:\app\DocsFileData does exist on your device. Application will use the primary key of the Docs record and the file name to create physical copies of the files submitted to the virtual on-demand Data field.
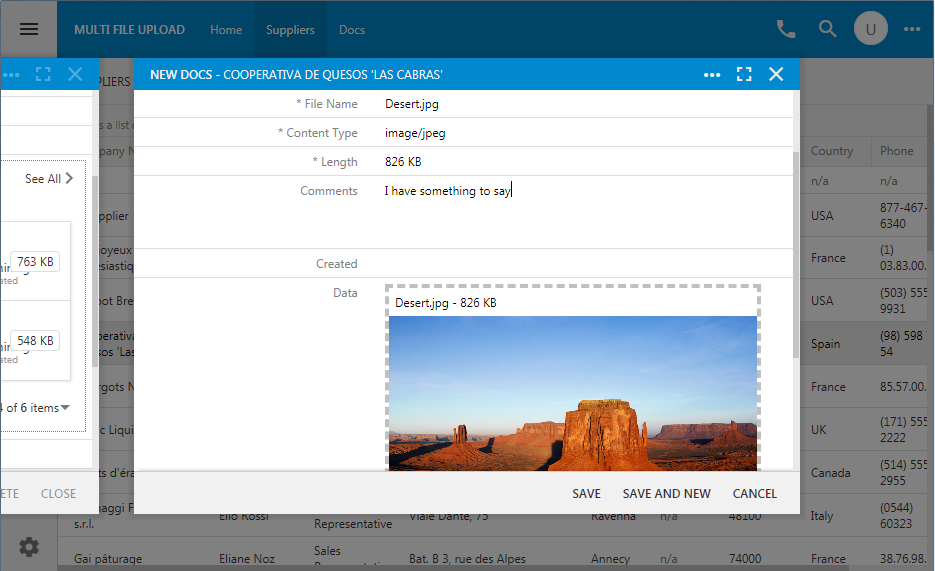
Add a new action with command name set to Upload to action group Docs / Actions / ag3 .

Proceed to drag Docs controller onto Suppliers controller or copy Docs and paste onto Suppliers. This will create a new field with type DataView and name Docs in the fields of Suppliers controller. Drag the new field to editForm1 view in the same controller.
Run the application and select a supplier.

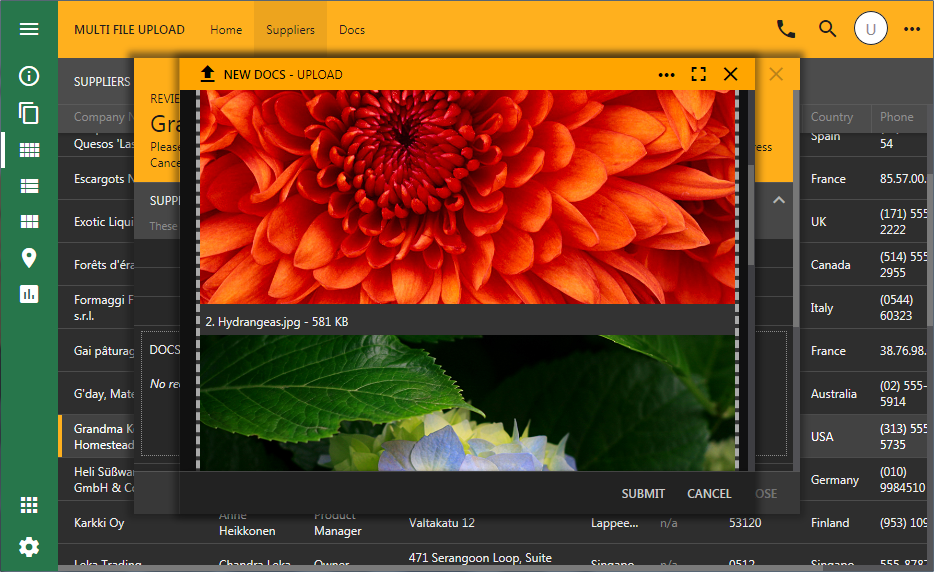
Select Upload action and choose multiple files to upload.
Tap submit and see the corresponding records appear in the app.
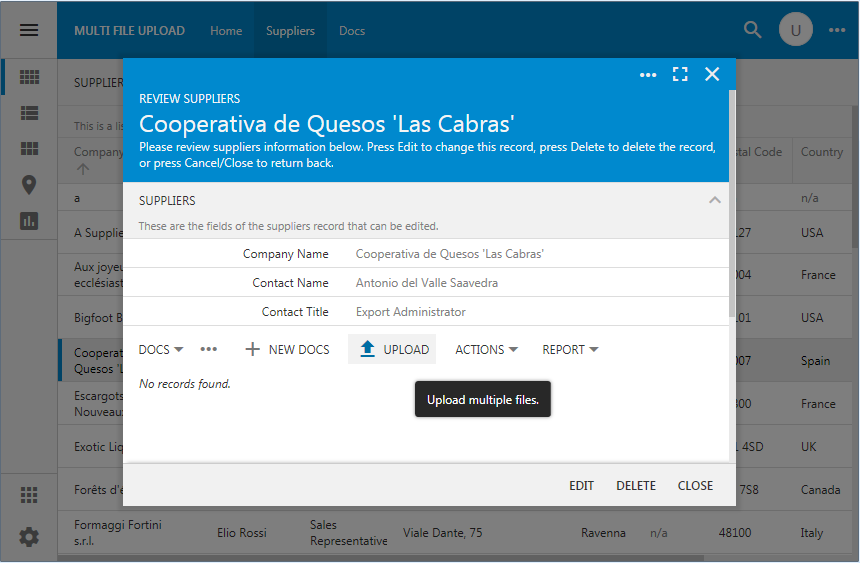
The entire process take a few seconds. User can choose individual records to add comment. There is also an alternative it to create one record at a time if a more deliberative data input mode is desired.

Multi-file upload significantly improves ease-of-use for document management applications.
Here is how it works:
1) Start upload.

2. Select multiple files.

3. Preview the selection and tap Submit.
4. Multiple database records are created for each file and associated with a parent if needed.
The feature is activated when the Upload action is executed by the data controller. A built-in form is displayed to allow selecting multiple files for upload. User submits the form and the framework starts processing files one by one. For each file an Insert action is executed through the same data controller. By default, the view createForm1 is used to figure a list of data fields for Insert. An alternative view can be specified in Command Argument of Insert action. Special fields are detected to store File Name, Content Type, and Length of the file. For child data views, the master field values are also included. If insert is successful, then the physical file is uploaded to the server and stored in the first on-demand field of Byte[] type. Failure to insert a record or to upload a file will interrupt the processing. The data view is refreshed when processing of all files has been completed.
Consider the following database schema that allows associating documents with the supplier records.

Table Docs defines three explicit fields to maintain information about the files: FileName, ContentType, and Length. The physical data will be stored outside of the database and processed with File System Blob adapter.
Start Code On Time and create an app with two data models - Suppliers and Docs. Next, start Project Designer and begin defining the new field with the name Data and type Byte[] in Docs controller. Mark the field as On Demand. Enter DocID in Source Fields and DocsData in On Demand Handler. Choose Thumbnail in On Demand Style drop down to have a file preview in the app. Save the new field and drag it to createForm1, editForm1, and grid1 in the Docs controller.

Select Docs data controller and enter the following in the Blob Adapter Config property:
Field: Data
Storage-System: File
Path-Template: C:\app\DocsFileData\{DocID}-{FileName}
File-Name-Field: FileName
Content-Type-Field: ContentType
Length-Field: Length
Make sure that the specified folder C:\app\DocsFileData does exist on your device. Application will use the primary key of the Docs record and the file name to create physical copies of the files submitted to the virtual on-demand Data field.
Add a new action with command name set to Upload to action group Docs / Actions / ag3 .
Proceed to drag Docs controller onto Suppliers controller or copy Docs and paste onto Suppliers. This will create a new field with type DataView and name Docs in the fields of Suppliers controller. Drag the new field to editForm1 view in the same controller.

Run the application and select a supplier.
Select Upload action and choose multiple files to upload.

Tap submit and see the corresponding records appear in the app.

The entire process take a few seconds. User can choose individual records to add comment. There is also an alternative it to create one record at a time if a more deliberative data input mode is desired.
Multi-file upload significantly improves ease-of-use for document management applications.